are a girls best friend! And a great accent for a card maker. This weeks challenge at SweetSassyDiva is to use our Cricut to put some diamonds on ... whatever we chose.
I honestly had no plan when I sat down at my craft table today. I opened the Cricut booklet that happened to be out on my table - Holiday Cakes - and found this great diamond border with a top layer. I then went to my Stampin Up Color Coach and picked a random combo... Pink Pirouette, Bravo Burgundy and Sahara Sand.
I cut the diamond border at 1.14 inches, 3 times and the top layer once. I laid the ribbon on the card front then attached the borders over the top and tied a bow. I made the flower from Art Philosophy at 4.5 inches ( next time I would make it smaller). I added some extra loops and tails of ribbon and then used my hot glue gun to attach the flower. A bit of hot glue in the center to hold the clear rhinestone and some gel gen dots and this simple card is done.
As always, thanks for stopping by :)
Showing posts with label Sweetsassydiva. Show all posts
Thursday, May 3, 2012
Monday, March 12, 2012
Spring Blooms
Can't believe spring is almost here! Our winter here in New Jersey has been so mild it's seemed like spring since our only real snow storm ~ on Halloween !
For this weeks challenge - Spring Blooms - I decided to make a flower pot card. I know, this is so last year, but I never got around to making one. I followed the great tutorial found at Splitcoaststampers.
I set my flowers, from Create A Critter, up on the Gypsy to cut at 3 inches. I used papers from Stampin Up's Salebration.
I assembled the flowers, inked the edges and added some tiny paper flowers with brads in the center.
The sentiments are from Stampin Up as is the ink and ribbon.
For this weeks challenge - Spring Blooms - I decided to make a flower pot card. I know, this is so last year, but I never got around to making one. I followed the great tutorial found at Splitcoaststampers.
I set my flowers, from Create A Critter, up on the Gypsy to cut at 3 inches. I used papers from Stampin Up's Salebration.
I assembled the flowers, inked the edges and added some tiny paper flowers with brads in the center.
The sentiments are from Stampin Up as is the ink and ribbon.
Monday, February 20, 2012
You're Invited
That's right, you're invited to a blog hop! Edited to correct the dates of the hop !!! March 10 & 11 SweetSassyDiva is having a blog hop to celebrate her birthday so this week the theme is to make an invitation for any event. As you can see my invite is for all of you to come to this exciting blog hop!
The details:
Cricut Birthday Bash - You're Invited - 1.5"
Cricut A Child's Year - to, a .75"
Cricut Gypsy Font - Blog Hop - 1"
The when, where and rsvp were done on the computer.
The ribbon is from my stash.
I hope you will put the date for the hop in your calendar and come and join the fun !
As always, thanks for stopping by :)
The details:
Cricut Birthday Bash - You're Invited - 1.5"
Cricut A Child's Year - to, a .75"
Cricut Gypsy Font - Blog Hop - 1"
The when, where and rsvp were done on the computer.
The ribbon is from my stash.
I hope you will put the date for the hop in your calendar and come and join the fun !
As always, thanks for stopping by :)
Saturday, February 18, 2012
Make Something Fun...
...that's the theme here at SweetSassyDiva this week! I chose a quick and easy little candy holder. I made mine for Valentines Day, but it will work for any occasion.
Start with a piece of card stock that is 3" x 7 3/4"
Score as shown below:
Fold on score lines and add adhesive
To make the rosettte I used Ribbons and Rosettes. I welded 4 - 1.26" sections together.
I scored this piece every 1/4" and attached the ends together with hot glue.
I punched out 2 - 1" circles , inked the edges and glued to the center of the front and back of the rosette. I stamped a heart from Stampin Up and cut out and pop dotted to the circle.
The rosette is attached to the front of the box with hot glue.
I cut a piece of ribbon about 7" long and used heart brads to attach to the box.
I put Ghiradeli squares inside and it's ready to give to my one and only valentine... my husband !
As always, thanks for stopping by :)
Friday, February 10, 2012
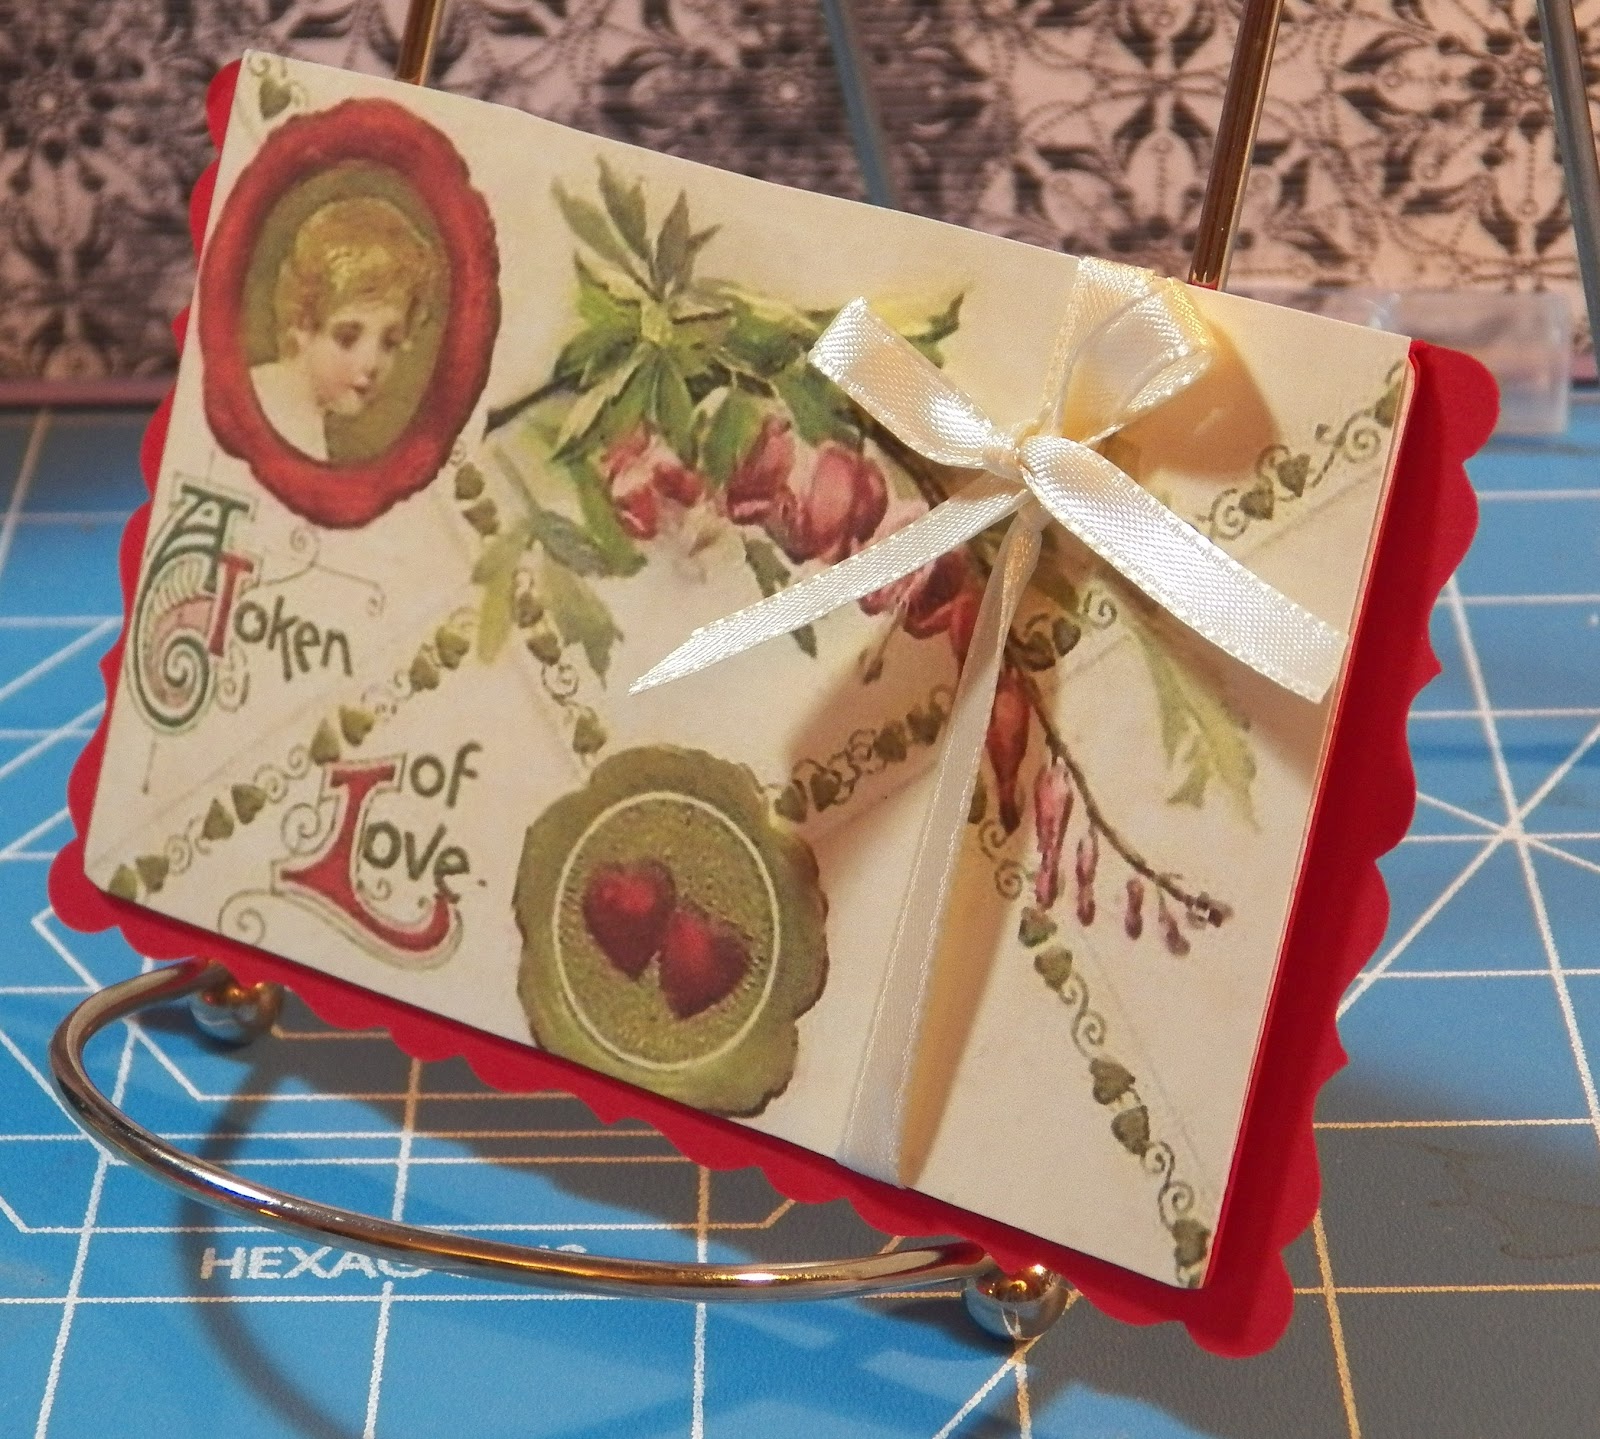
Vintage Valentine
is the theme for this weeks challenge at SweetSassyDiva.
To make this simple card all you need is the Birthday Bash cartridge for the card base cut at 5". The image is something I found online years ago (before I figured out that I should be keeping the websites where they came from) so I can't give you a source... so sorry... and some ribbon to finish it off.
Please check out all the other vintage Valentines project that the design team have made this week. You still have time to make some of your own !
As always, thanks for stopping by :)
To make this simple card all you need is the Birthday Bash cartridge for the card base cut at 5". The image is something I found online years ago (before I figured out that I should be keeping the websites where they came from) so I can't give you a source... so sorry... and some ribbon to finish it off.
Please check out all the other vintage Valentines project that the design team have made this week. You still have time to make some of your own !
As always, thanks for stopping by :)
Friday, February 3, 2012
My First Video!
Well. I bit the bullet and did my first video! I had fun doing this and hope to do more!
This is for the SweetSassyDiva challenge Hidden Journaling/Sentiment.
The details for this card are:
Card stock 5 1/2 " x 11 15/16"
Card stock 3 1/4" X 4 1/2"
Border ~ Paper Trimmings 1 x 11"
Birds ~ Celebrate with Flourish 1.25 "
Heart Topper ~ Cricut American Alphabet .80"
Template below:
This is for the SweetSassyDiva challenge Hidden Journaling/Sentiment.
The details for this card are:
Card stock 5 1/2 " x 11 15/16"
Card stock 3 1/4" X 4 1/2"
Border ~ Paper Trimmings 1 x 11"
Birds ~ Celebrate with Flourish 1.25 "
Heart Topper ~ Cricut American Alphabet .80"
Template below:
This is an easy project that has many uses. I hope you will give it a try.
As always, thanks for stopping by :)
Thursday, January 26, 2012
Scene It
This weeks challenge at SweetSassyDiva nearly had me sitting on the sidelines 'cause I'm not a scrapper.... I know, I know, how can that be??? I love making cards and other paper crafts, but I leave the scrapbooking to my daughters! But Bobbi Jo took pity on me and is allowing me to follow the Scene It challenge in my own way. So I decided to make a wall hanging.
The base for this is a wooden plaque that I bought years ago from the Dollar Spot at Target. I put it on the shelf in the closet and pretty much forgot about it. Until this weekend when I decided to use it for this project.
See why am choosing to cover it up :)
I started out by covering it with a pale blue, layering it with the rolling hills, house, tree, fence and grass.
The tree is a stamp from Stampin Up that I cut out. The hearts are from a Stampin Up Punch
I popped the birds up with dimensionals and added some white gel pen dots.
I sponged the edges of the grass and the hills and did black stitching on the fence.
I think I am going to hang this in my craft room.... It could use a little wall treatment :)
After seeing these pictures, I think I am going to be adding some stickles and glitter and maybe some glossy accents... It looks a bit to plain to me :)
The details:
House ~ Pop Up Neighborhood ~ 4 inches
Fence ~ Pop Up Neighborhood ~ 1.6 inches
Rolling Hills ~ Pop Up Neighborhood ~ 4 inches
Grass ~ Paper Trimmings ~ 2.5 inches
Birds ~ Holiday Cakes 1.5 inches.
All paper is from Stampin Up
So, do you have something put away that would make a good background for a scene using some of your favorite Cricut cartridges??? If you are a scrapper, then jump in with a one or 2 page 12 x 12 layout. But if you are layout challenged, like I am, then find something to cover with a scene of your choice. When you are finished, I hope you will put a link to your creation in the comment section so we can stop buy and check it out !
A always... thanks for stopping by :)
The base for this is a wooden plaque that I bought years ago from the Dollar Spot at Target. I put it on the shelf in the closet and pretty much forgot about it. Until this weekend when I decided to use it for this project.
See why am choosing to cover it up :)
I started out by covering it with a pale blue, layering it with the rolling hills, house, tree, fence and grass.
The tree is a stamp from Stampin Up that I cut out. The hearts are from a Stampin Up Punch
I popped the birds up with dimensionals and added some white gel pen dots.
I sponged the edges of the grass and the hills and did black stitching on the fence.
I think I am going to hang this in my craft room.... It could use a little wall treatment :)
After seeing these pictures, I think I am going to be adding some stickles and glitter and maybe some glossy accents... It looks a bit to plain to me :)
The details:
House ~ Pop Up Neighborhood ~ 4 inches
Fence ~ Pop Up Neighborhood ~ 1.6 inches
Rolling Hills ~ Pop Up Neighborhood ~ 4 inches
Grass ~ Paper Trimmings ~ 2.5 inches
Birds ~ Holiday Cakes 1.5 inches.
All paper is from Stampin Up
So, do you have something put away that would make a good background for a scene using some of your favorite Cricut cartridges??? If you are a scrapper, then jump in with a one or 2 page 12 x 12 layout. But if you are layout challenged, like I am, then find something to cover with a scene of your choice. When you are finished, I hope you will put a link to your creation in the comment section so we can stop buy and check it out !
A always... thanks for stopping by :)
Friday, October 14, 2011
Wrap it up Wreath
I have to tell you, this is a VERY exciting day for me. This is my first project as a Design Team Member for Sweetsassydiva ! This weeks challenge is to make a wreath. Since fall is my favorite time of year, of coarse I would be using warm, fall colors.
I started by using my Gypsy to make the wreath form. I put 2 circles from George and Basic shapes on my mat and sized them at 9.5" and 6.25"
Next came the leaves... lots of leaves...that are from Everyday Paper Dolls, cut at 2" in 3 colors. I used metalic gel pens to bring out the cut lines and sponged the edges in Close to Cocoa from Stampin Up. Then I embossed them using the Forest Branches Cuttlebug folder.
The acorn image is from Holiday Cakes. I cut the shadow, base and shift layer all at 2". For the base and shadow I used the auto fill feature on the Expression 2 . I set the paper size to 11" x8.5", chose the image, sized to 2", then hit the auto fill.
I did the same thing with the shadow and shift layer. After I had the 3 layers cut out I decided that I wanted more than the 2 basic colors, so I got the Gypsy out again and pulled up the shift layer. I did the hide contour thing so I could cut the berries in one color then the leaves in another color.
I inked all the edges and put them together. I have some spare parts to use in future projects :)
Some feather yarn for the hanger, a few rhinestones and some of the extra small leaves were added and I called it done.
One thing I want to mention is I used my hot glue gun to assemble this project. I have found that things that have been embossed are hard to attach with double stick tape or regular paper crafting glue.
My supply list:
Cricut Cartridges : Holiday Cakes, Everyday Paper Dolls, George and Basic Shapes
Cards stock - Stampin Up -More Mustard, Cajun Craze, Really Rust, Early Espresso, Mellow Moss, Tangerine Tango, Crumb Cake
Ink - Stampin Up Close to Cocoa
Patterned paper - old Stampin Up Designer paper
Sakura Gel Pens - Lime Star and Gold
Feather Yarn
Rhinestones
I started by using my Gypsy to make the wreath form. I put 2 circles from George and Basic shapes on my mat and sized them at 9.5" and 6.25"
and cut out using a 12x12 sheet of brown card stock.
The acorn image is from Holiday Cakes. I cut the shadow, base and shift layer all at 2". For the base and shadow I used the auto fill feature on the Expression 2 . I set the paper size to 11" x8.5", chose the image, sized to 2", then hit the auto fill.
I did the same thing with the shadow and shift layer. After I had the 3 layers cut out I decided that I wanted more than the 2 basic colors, so I got the Gypsy out again and pulled up the shift layer. I did the hide contour thing so I could cut the berries in one color then the leaves in another color.
I inked all the edges and put them together. I have some spare parts to use in future projects :)
Some feather yarn for the hanger, a few rhinestones and some of the extra small leaves were added and I called it done.
One thing I want to mention is I used my hot glue gun to assemble this project. I have found that things that have been embossed are hard to attach with double stick tape or regular paper crafting glue.
My supply list:
Cricut Cartridges : Holiday Cakes, Everyday Paper Dolls, George and Basic Shapes
Cards stock - Stampin Up -More Mustard, Cajun Craze, Really Rust, Early Espresso, Mellow Moss, Tangerine Tango, Crumb Cake
Ink - Stampin Up Close to Cocoa
Patterned paper - old Stampin Up Designer paper
Sakura Gel Pens - Lime Star and Gold
Feather Yarn
Rhinestones
Subscribe to:
Posts (Atom)